This Malabrigo Finito is a trickster. First of all, it snuck into my stash in a most surprising way. Knitting Union is a collaboration of three great designers: Tonia Barry, Susan Mills, and Kim Barnette. In 2019, Knitting Union sponsored a summer-long knit-a-long. You got one entry for the prize basket for each Knitting Union item you knit during the KAL. Well, I can be a bit prolific. Plus three months is a long time. I ended up inadvertently stuffing the prize box because I really do like a lot of their patterns. It turned out that I won the basket. It was filled with a wonderful assortment of yarn and knit-related goodies, including just over 1000 yards of Malabrigo Finito, a fingering weight merino.
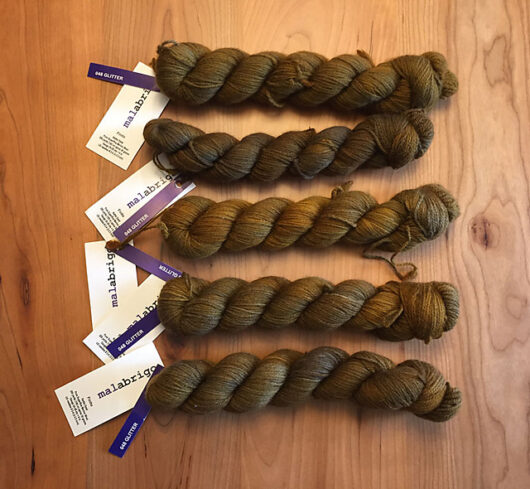
Malabrigo does not come in dye lots. I am not meaning to look a gift horse in the mouth, but the photo above is true to the color of my Glitter colorway–at least on my screen. You can probably spot the problem. The bottom three skeins are a fairly close match. The 4th skein from the bottom is a good bit darker than the bottom three. And the top skein is in between. Conventional knitting wisdom says I should have alternated the skeins. Oh please. I just hate doing that! The few times I’ve tried it, it turned out to be an unpleasant tangle and an unpleasant knit. I had the idea, undoubtedly not a new one, that the right pattern could hide the differences between the skein somewhat effectively.
I have to apologize that the color of the Glitter colorway is going to bounce around in this post. It simply refused to cooperate in consistently photographing the way the eye sees the colors. I tried it outside. I tried it inside. I tried it on a cloudy day. I tried it on a sunny day. Same for natural light and artificial. So prepare for the color of this yarn bouncing around through this post. The yarn is the brown shade you see above. It is not as gold as my finished shawl photos make it appear. And, despite its name, there are no sparkles in Glitter.
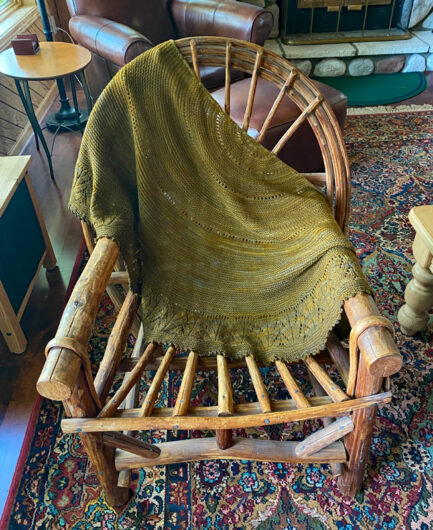
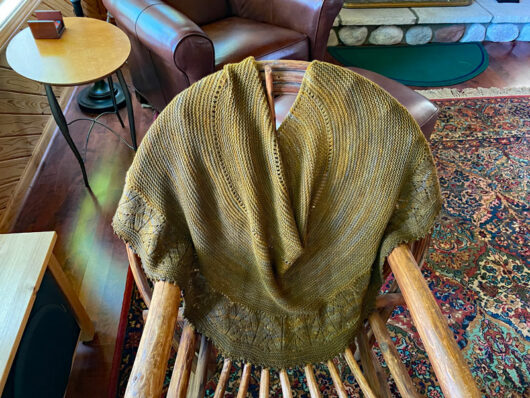
This is Helen Stewart’s Floating Shawl. She’s Hells Bells on Ravelry. Stewart is a very prolific Australian designer who I did not know until Floating Shawl made its way into my queue. It has all the traits I look for in a good shawl pattern. It is generously sized. After blocking, mine is 24 inches at its deepest point and measures 56 inches across the top. It is a mix of an easy relaxing knit with slightly more challenging sections. And the crescent shape assures that I don’t have the point of a triangle aimed right at my butt. Perfect.
Floating Shawl gave me some good ways to hide the fact that my Malabrigo skeins didn’t match. Here’s what worked well for me and involved almost none of the dreaded alternating skeins. I started at the neck edge with the lighter two skeins. Moving from light to dark helped make the color changes look like a planned progression. I started a third skein in just after an eyelet row, a sort of natural divide. Then, over 6 garter ridges, I alternated that 3rd skein with one of the lighter ones. I started a 4th skein at the lace section, another natural divide where the eye can be tricked into seeing the new pattern rather than the new shade. And then I used the final skein at the start of the last garter stitch section all the way to the end of the picot bind-off. This was only possible because (as reported by a few other Ravelers) this shawl took closer to 800 yards than the 950 the pattern called for. And I had 1000 yards in my 5 skeins.
Floating Shawl turned out to be a calm, relaxing knit. I thought that the lace section, with more than 500 stitches, would be difficult. It wasn’t. Every wrong side row was the same easy repeat. In the first lace row I set markers every 16-stitch repeat. That worked out well.
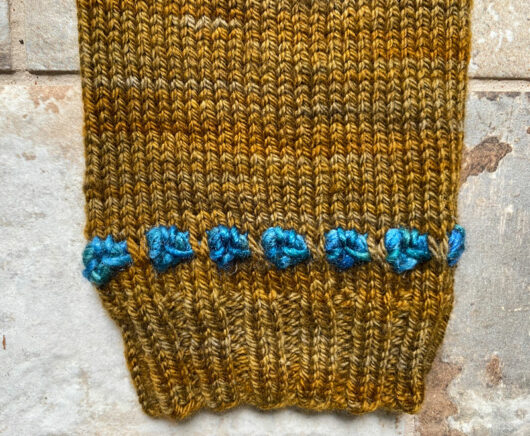
What did I do with my extra Finito? These fingerless mitts are Melanie Berg’s fingering weight freebie: Rainy Day Mitts.
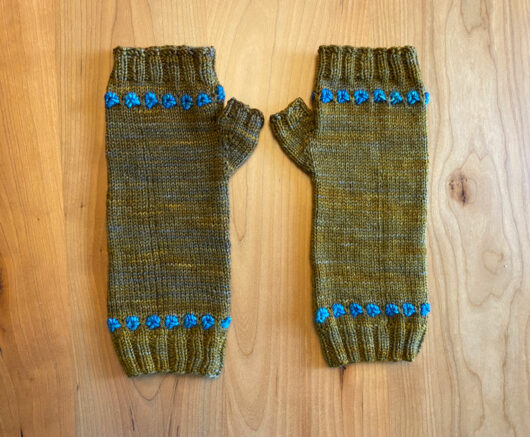
I used 48 grams of yarn for this pair, including the weight of 8 rounds of the blue star stitch detailing.
My only modifications were that I added 2 rounds to the hand area just below the top ribbing. I’d have added a few more rounds but I wasn’t sure of my yardage. And I picked up 7 stitches in the gap area of the thumb, rather than the 5 that the pattern called for. My gap just wanted more stitches picked up. In the 6th round of the thumb, just before beginning the ribbing, I decreased 2 stitches on the gap side so that the 2 by 2 ribbing before the cast-off would line up properly.
Now, how did I hide the differences in the colorway? I didn’t. Not one bit. If anyone decides to point that out while I’m wearing them my fingers will be free to tweak their upturned nose.
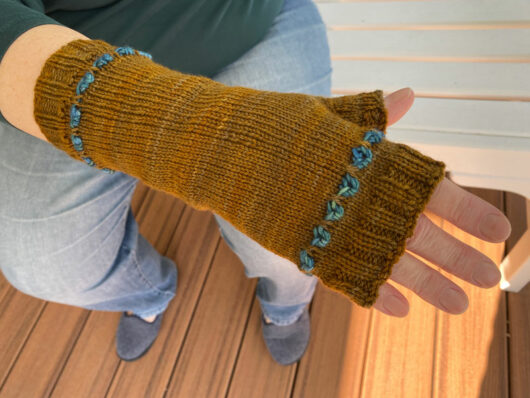
I was prepared to not be pleased with these mitts. The pattern just looked a little long in the wrist and plain in the design. But, just the opposite, it turns out that I really like this pair. I’m happily keeping them for me. And the sweet star detailing is just enough to dress these up.