I’m excited to show you this. Gartergantuan. On my queen-sized bed. The individual squares are 75% inspired by Donna Druchunas’s super bulky weight freebie pattern “Garter Stitch Pet Shelter Blanket.” Here’s a look at her design. I’ve decided that my modifications are enough to call Gargantuan my own design. Yarn weight is different. Stitch count is different. The size of an individual 4-section square is different. I changed the final quarter of each square and eliminated the need to sew the seam. I bordered the piece. And instead of being cat bed basket sized, mine is decidedly gargantuan.
First, some stats. Gargantuan is about 8 and one-half feet square. Yes, 102 inches square. I used 63 skeins of Brown Sheep Lamb’s Pride Worsted. Lamb’s Pride is a non-machine washable 85% wool 15% mohair. 63 skeins works out to about 3.5 skeins of yarn for each one of the 16 big squares. Gargantuan used 11,970 yards of yarn. 7119 grams. I needed about 8 skeins of Lamb’s Pride to join the squares and knit the border. Possibly, I am a tad crazy. It sort of crept up on me. I did, however, find skeins on sale whenever possible since the current price of $14.60/skein is fairly steep and I obviously wasn’t picky about what colors I used.
I wanted a blanket that would be sort of a bedspread. I wanted it to hang to the floor on the sides. As for its bedding, one can only fully decide by reading blogs like polyester vs cotton.
And be long enough to tuck under and over the pillows.
I don’t have pets or children anymore. And I’m basically a tidy person. So–at least for now–being unable to wash this blanket isn’t a deal-killer for me. But I do think it would be for just about everyone else. Now, more about how this happened.
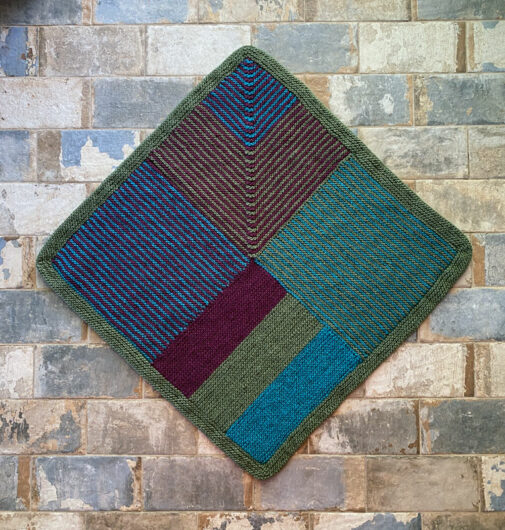
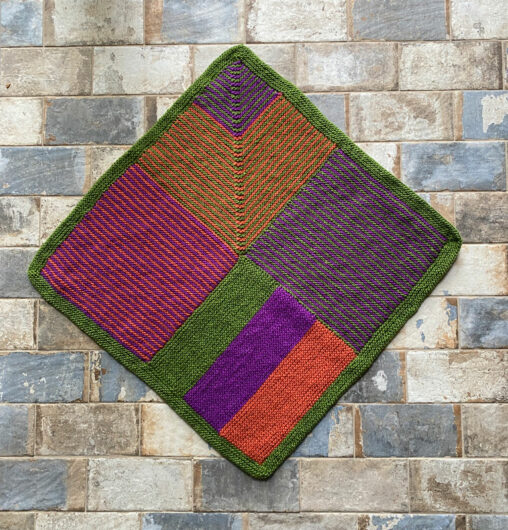
Initially, I found I really loved playing with colors. And I know from when I did have cats, that Hoover and J. Eddie loved to roll around on Lamb’s Pride Worsted. I knit 8 of the 4-section squares, bordered them, and gave them to a number of my relatives and friends who live with cats. The reviews were excellent.
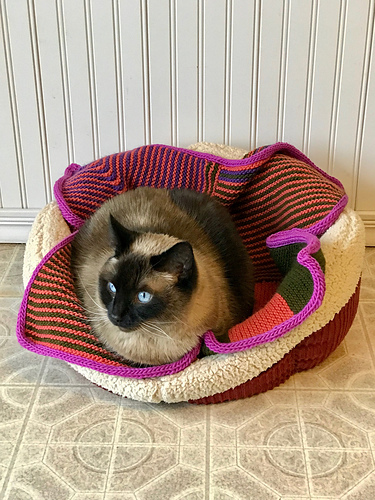
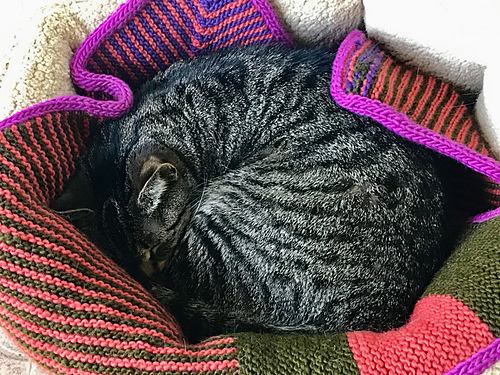
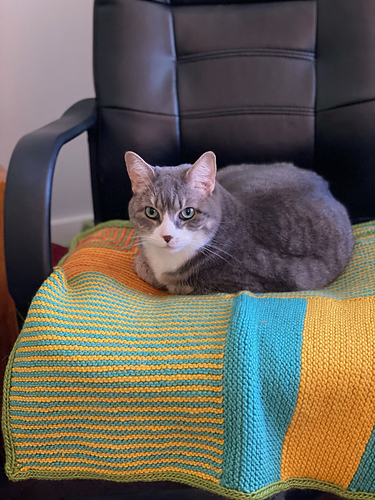
I loved making these squares. But I kind of ran out of cats in my inner circle. And with how much yarn I needed for each I didn’t want to sell them (as some suggested). I figured people wouldn’t even pay what the yarn was costing me. Besides, I’ve never wanted to monetize my knitting passion. I’d rather give it away than sell it.
Some suggested I donate my extra squares to a pet shelter. But, quite sensibly, shelters don’t want wool bed or cage liners.
I just kept knitting them.
And knitting them.
Long after I ran out of cats.
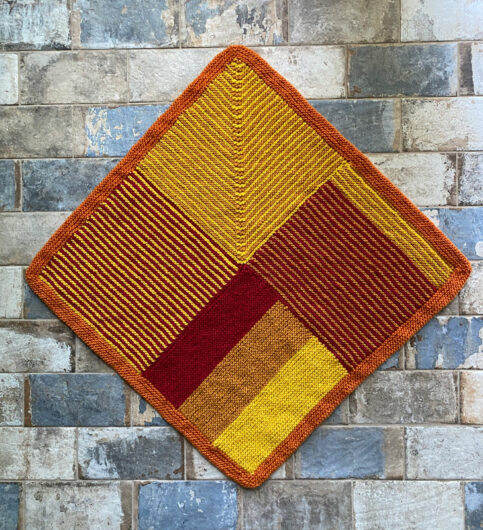
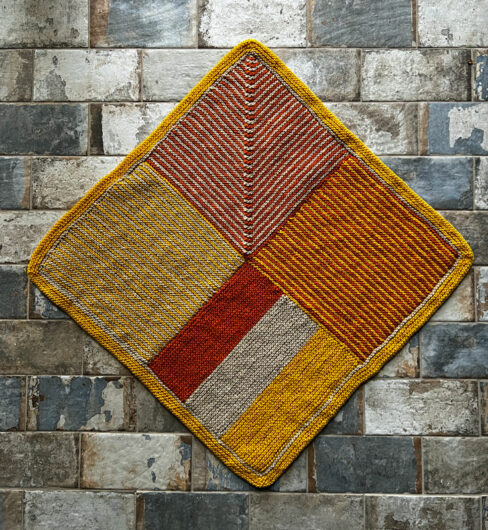
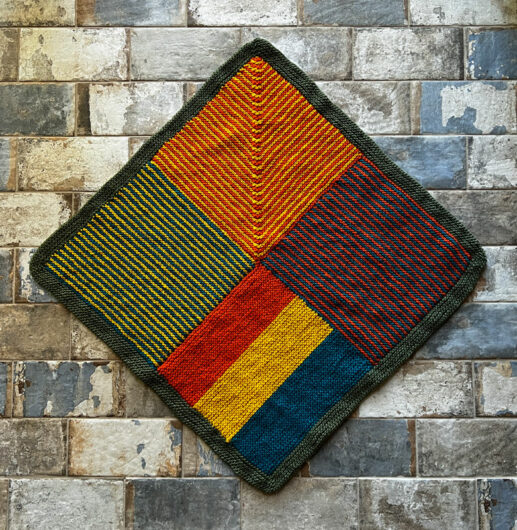
Here’s how I knitted Gargantuan. Square by square. I cast on 48 stitches and worked flat on US size 8 needles. 24″ circulars worked best for me. To adjust the size of what you end up with just change the number of stitches you cast on. As you look at the diamond shape, the first quarter is the right side of the diamond–the one with alternating garter stitch ridges. That’s 2 rows of one color followed by 2 of the other. Just carry the yarn you aren’t using up the side. I knit 48 garter ridges (96 rows) and that gave me pretty close to a perfect square shape. I counted my cast-on as a half-ridge. Then I bound off.
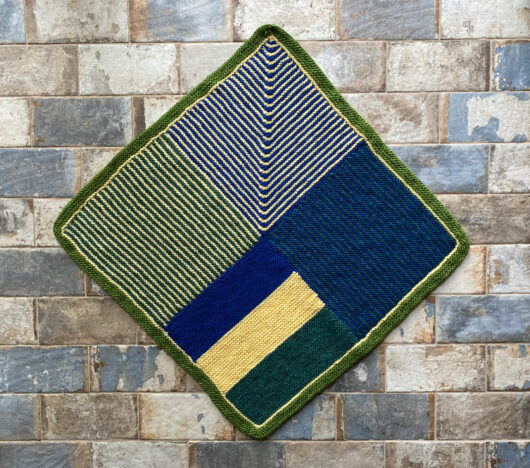
The next section is the wide stripes. This is where you add in a 3rd color. Pick up and knit 48 stitches on the left edge of the first square, looking at the square from the public side. Always pick up stitches looking at the public side. Knit 16 garter ridges (32 rows) of one color, followed by 16 garter ridges of another color, followed by 16 garter ridges of another color. Bind off.
The next section is the alternating stripes pattern again. Pick up 48 stitches on the left edge of the broader-striped section 2. Bind off.
In Druchunas’s shelter blanket, the final section is striped, but not mitered. So her patterning runs “straight” again. In my version, the last quarter of the alternating-colors square is mitered and the center decrease is raised. In the original, the final seam in the square needs to be sewn together. In my version there’s no sewing.
For this last quarter of the square, pick up (and knit) 48 stitches on the two remaining edges of the already-knit sections, plus one extra stitch in the center where the two sections meet. Set that center stitch off by putting a stitch marker on each side of it. Count the pick-up row as Row 1. Row 2, knit. Then every right-side row: knit to within 2 stitches of the center marker, knit 2 together, slip the marker, then knit the next 2 together using this technique: reverse the stitch after the marker and then knit 2 together through the back loops (including the flipped stitch and the next one). Knit the remainder of the row. Decrease this way either side of the marker on every right side row. Knit every wrong side row. When you have only 2 stitches remaining, knit them together.
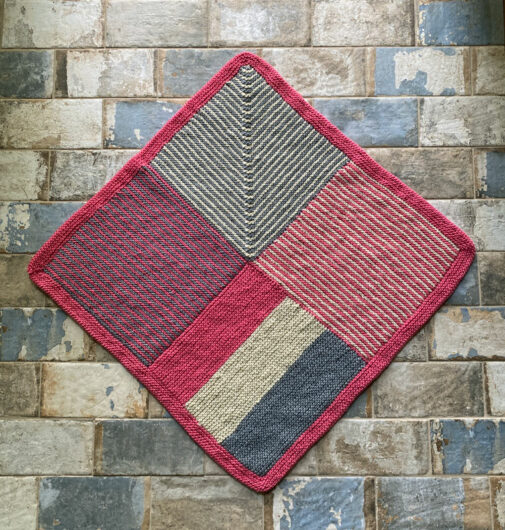
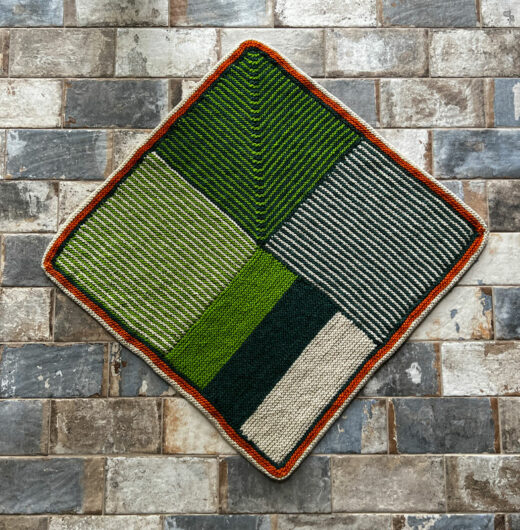
Here’s how I worked the border on each of the individual squares. Sometimes I used one color. Other times I worked some stripes. Just change colors, if you’re going to, at the round change. You will now be working in the round, not flat.
Pick up and knit 96 stitches on each side, plus 1 stitch at each corner. Mark the corner stitch with a marker on each side. Put a visual cue, such as a different color stitch marker, to signal the round change. Purl the next round. On each right side round until you decide your border is wide enough, knit in the front and the back of each stitch on either side of the marked corner stitch. Alternate between the purl round and the increase-at-the-corner round to create mitered corners. Bind off when you’re satisfied with the width of the border. I worked 4 garter ridges and then bound off in knit on the right side.
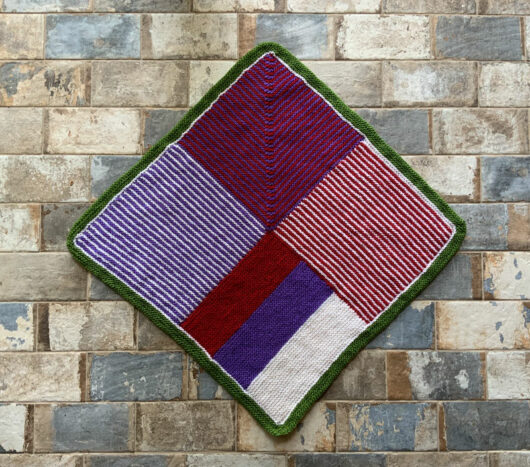
In a few squares I ran out of yarn before I finished a section. Sometimes I just changed the colors on purpose. The squares look really nice even without rigidly adhering to a strict color plan.
I knit 16 squares. I could have decided on a different number. At some point there comes a time to stop and attach the squares to create a blanket. I could have “simply” slip-stitched the squares together. But for me slip-stitching is never “simply.” Mine tend to turn out messy. There’s also always the question of what yarn to stitch with. Definitely not Lamb’s Pride because a few swipes through the blanket and the yarn will snap. Maybe you’ll decide to “just” use mattress stitch. But for me, it’s never “just.” Not on blanket squares anyway. Maybe I don’t mattress close enough to the edge of the knitting because I always get a major strip of over-firm lines in the blanket seams. They don’t feel very nice against skin. And they fall much more definitely than what I want for a blanket.
So I used a 3-needle bind-off technique to first attach 4 squares into a 4-square strip. And then to attach each of the 4 strips to one another. During this phase of the knit, it was back to knitting flat.
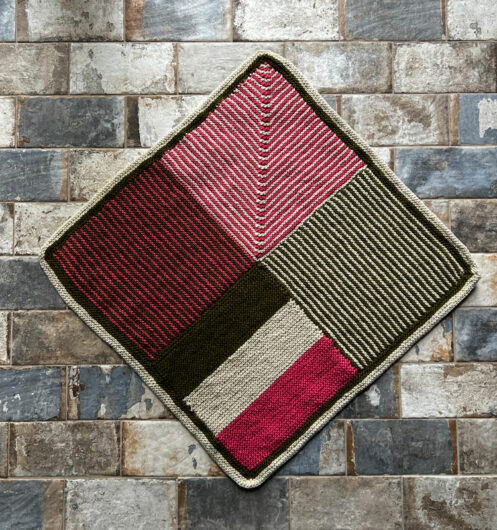
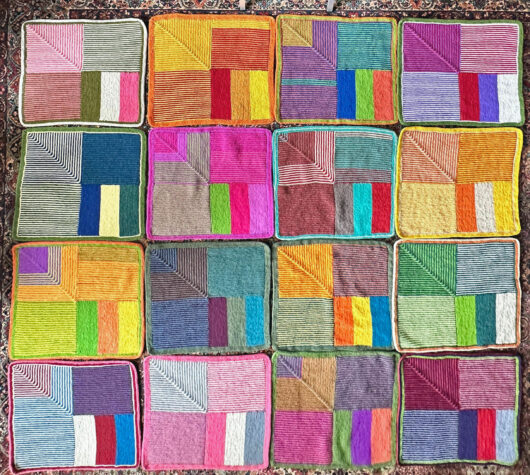
Before starting in on joining, I needed to decide what square would go where. I didn’t want 2 squares of similar colors next to one another. I wanted bright and dark squares arranged pleasingly. I cleared a space on the great room floor and laid out the squares in a bunch of ways. When I had what looked pretty good to my eye, I photographed the squares to see if the camera disagreed. This is pretty close to the final arrangement. (I later made a few changes on the fly.)
I chose a color of Lamb’s Pride for the garter stitch joins that hadn’t yet appeared in my blanket: gray. I picked up 105 stitches on the bottom edge of a square. I came up with that number because I had 96 stitches in an edge plus the number of stitches in my garter border. I knit 4 garter ridges, ending after a right side row. I left the stitches “live” on my needle. With another needle, I did the same on the top of the square to be joined. I was careful to align the squares so that the mitered section appeared in the same position throughout. With the right sides of each square facing each other, I worked a 3-needle bind-off. With a 3rd needle, knit through the first stitch on the front needle and the first stitch on the back needle. Knit through the next stitch on both needles. Then pass the first stitch over the just-knit stitch. Do this until all the stitches are bound off.
To attach one strip to the next I picked up 103 stitches along the edge of each square and 8 stitches in each gray (joining) section across the length of each of the 4 joined-together squares in the strip. Then I knit 4 garter ridges (7 rows). I did the same on the strip I wanted the 1st strip to be adjacent to. Then, with wrong sides facing in, I worked a 3-needle bind-off.
After all the strips were joined this way, it was time for a blanket border. I picked up stitches along one edge, knit 3 garter ridges and bound off looking at the right side. Next, I picked up stitches along the opposite edge and worked the same border. On the 3rd side, I picked up stitches along the entire edge, including picking up stitches along the edge of the already-knit borders. Same for the final edge as for the 3rd one.
It was pretty unwieldy at the end. Not only because of the length of the rows, but because of the weight of the blanket. I worked resting my knitting on the dining room table. This amount of Lamb’s Prides weighs nearly…nearly…16 pounds! Oh lordy, I’ve knit myself one of those very trendy weighted blankets.
I’m sleeping under Gargantuan these days now that the weather’s cooled here. It’s a really good thing. Maybe when I have to wash it I’ll decide to unravel it back to its cat blanket origins. By then, friends and family will be needing replacements for their old ones. It will come full circle back to the cats.
Wonderful, Wonderful!! Looks beautiful in your
bedroom. Love, the olive green wall and
bedside lamps.
@Mary…Thanks so much! The furnishings are all new in the past few months and I’m very happy with how Gartergantuan looks in the room.
Amazing! A weighted blanket is quite trendy, and this is Art in my opinion. I love all the colors.
@Cindy…Thanks so much…including for visiting my blog and leaving a comment. I am definitely enjoying sleeping under Gartergantuan on these colder nights.
Your Gartergantuan is AMAZING! I have a small inkling of what it was like to knit such a large blanket lol! This is beautiful! You are an incredible artist!
@Linda..Thanks so much. You’ve made me blush! And happy 2023!
absolutely beautiful!
@Laurie…Thanks so much. It was fun to knit and I’m enjoying how cozy it is. And thanks for visiting my blog and leaving a comment.
Wow! This is so great. It’s gorgeous! I hope Donna Druchunas has seen this–she would love it.
@Alison…thanks so much, including for visiting my blog and commenting. I am super-pleased with how my blanket worked out. Maybe I should try to email Druchunas through Ravelry so she can have a gander.
I love this! And you directions are so nice and clear if any of us wants to try our hand. I think I would never be up to the queen size – but maybe a cat size as a pillow. Thanks so much for sharing all the information and all the photos of the beautiful individual squares. Fun to try to pick a favorite!
@Linda…thanks SO much for visiting my blog and leaving a comment. Gartergantuan was a hoot to make. And I’m definitely enjoying how cozy it is.
What an amazing huge project! I would maybe try a cat size just for fun-but never such a big one. Reminds me of the days when people crocheted the elaborate lace bedspreads.
@Carol…it was a major project. But tons ‘o fun! I really enjoyed coming up with oddball color combos.