My Gartergantuan

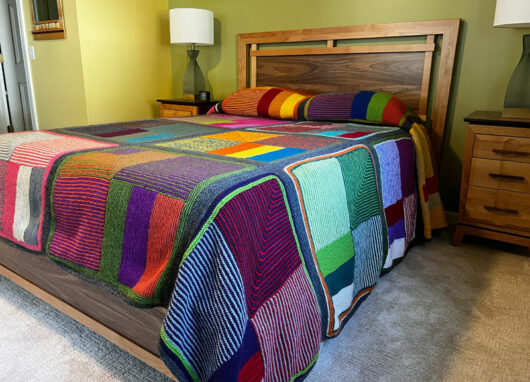
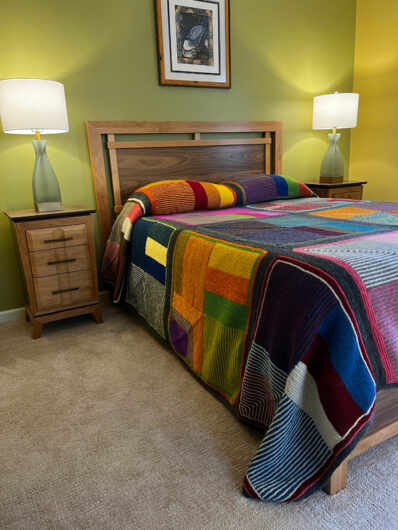
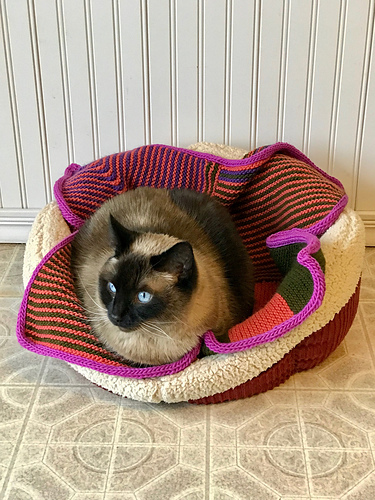
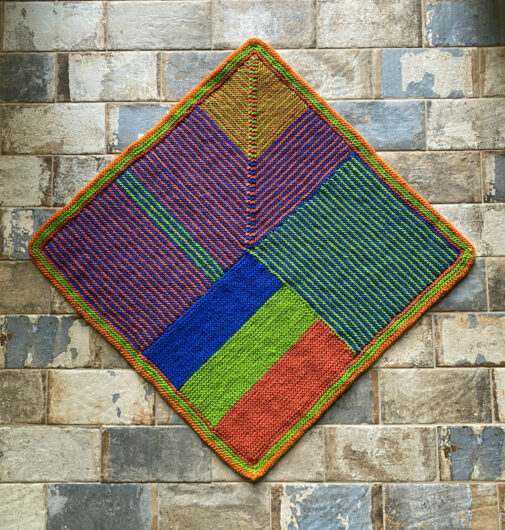
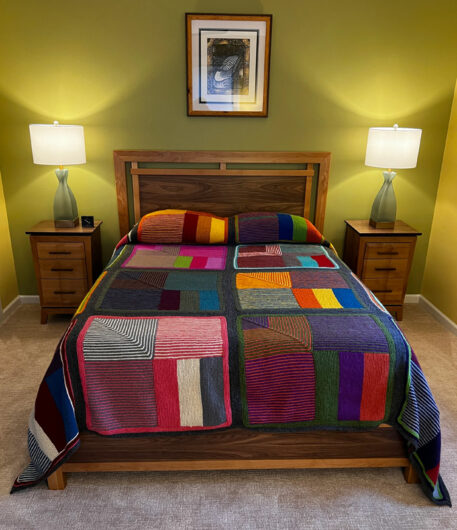
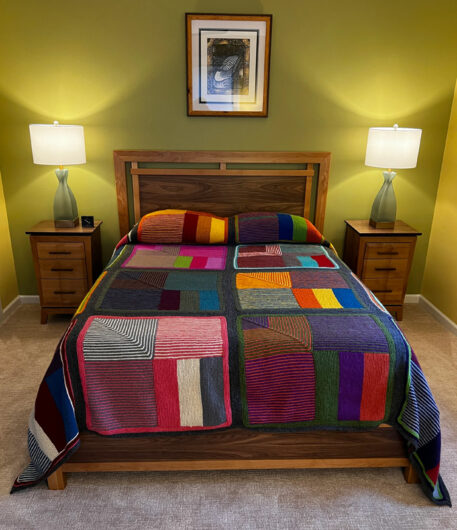
I’m excited to show you this. Gartergantuan. On my queen-sized bed. The individual squares are 75% inspired by Donna Druchunas’s super bulky weight freebie pattern “Garter Stitch Pet Shelter Blanket.” Here’s a look at her design. I’ve decided that my modifications are enough to call Gargantuan my own design. Yarn weight is different. Stitch count is different.The size of an individual 4-section square is different. I changed the final quarter of each square and eliminated the need to sew the seam. I bordered the piece. And instead of being cat bed basket sized, mine is decidedly gargantuan.

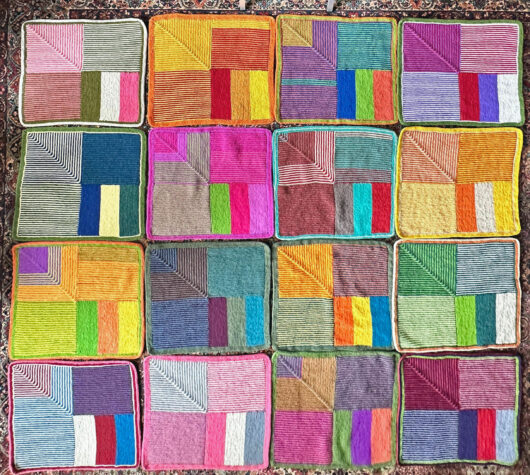
First, some stats. Gargantuan is about 8 and one-half feet square. Yes 102 inches square. I used 63 skeins of Brown Sheep Lamb’s Pride Worsted. Lamb’s Pride is a non-machine washable 85% wool 15% mohair. 63 skeins works out to about 3.5 skeins of yarn for each one of the 16 big squares. Gargantuan used 11,970 yards of yarn.  7119 grams. I needed about 8 skeins of Lamb’s Pride to join the squares and knit the border. Possibly, I am a tad crazy. It sort of crept up on me. I did, however, find skeins on sale whenever possible since the current price of $14.60/skein is fairly steep and I obviously wasn’t picky about what colors I used.

I wanted a blanket that would be sort of a bedspread. I wanted it to hang to the floor on the sides.

And be long enough to tuck under and over the pillows.

I don’t have pets or children anymore. And I’m basically a tidy person. So–at least for now–being unable to wash this blanket isn’t a deal-killer for me. But I do think it would be for just about everyone else. Now, more about how this happened.

Initially, I found I really loved playing with colors. And I know from when I did have cats, that Hoover and J. Eddie loved to roll around on Lamb’s Pride Worsted. I knit 8 of the 4-section squares, bordered them, and gave them to a number of my relatives and friends who live with cats. The reviews were excellent.

I loved making these squares. But I kind of ran out of cats in my inner circle. And with how much yarn I needed for each I didn’t want to sell them (as some suggested). I figured people wouldn’t even pay what the yarn was costing me. Besides, I’ve never wanted to monetize my knitting passion. I’d rather give it away than sell it.

Some suggested I donate my extra squares to a pet shelter. But, quite sensibly, shelters don’t want wool bed or cage liners.

I just kept knitting them.

And knitting them.

Long after I ran out of cats.

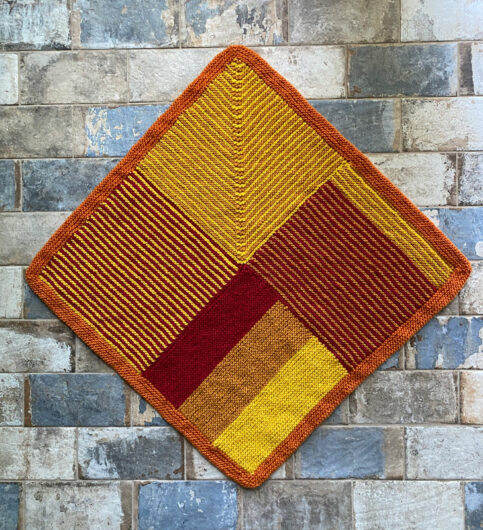
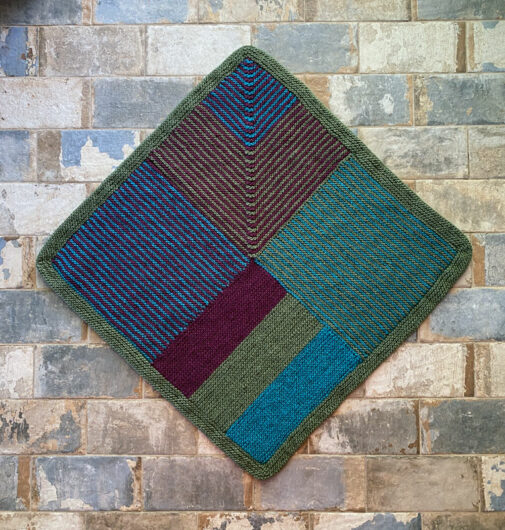
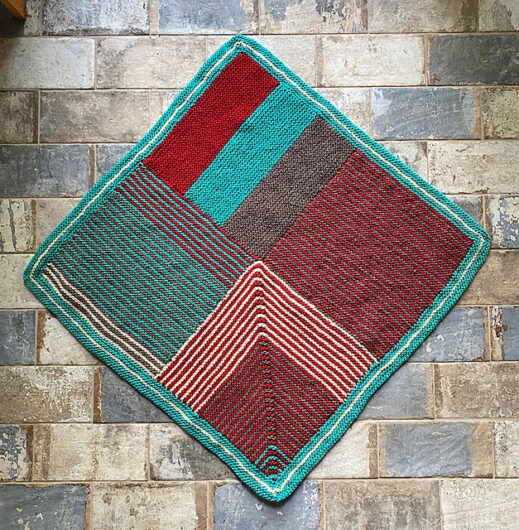
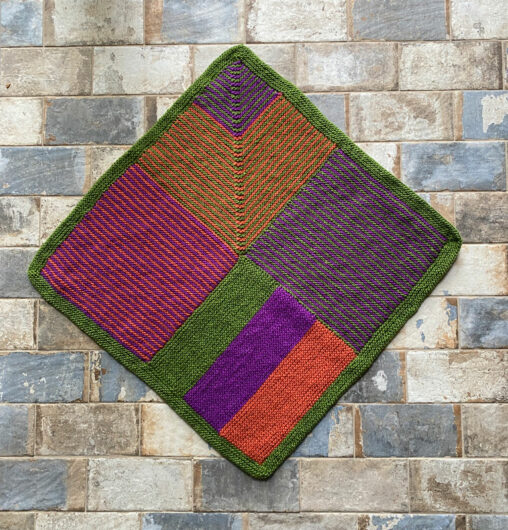
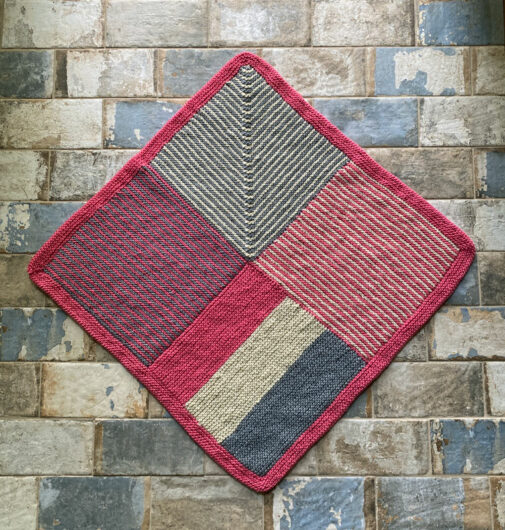
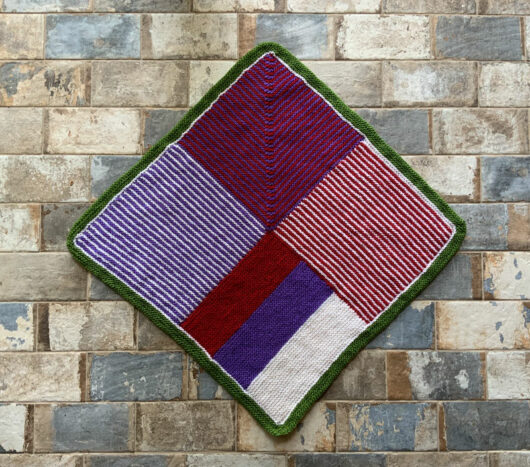
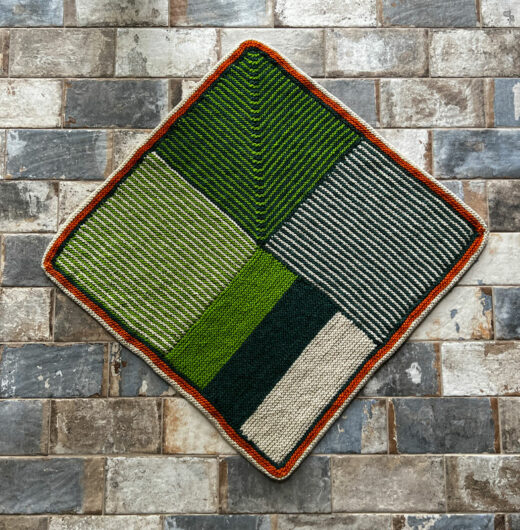
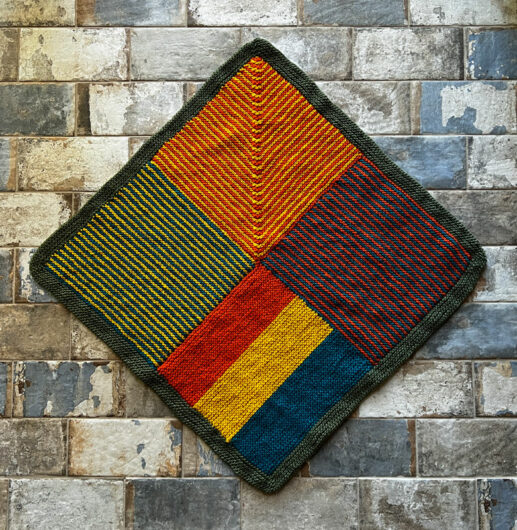
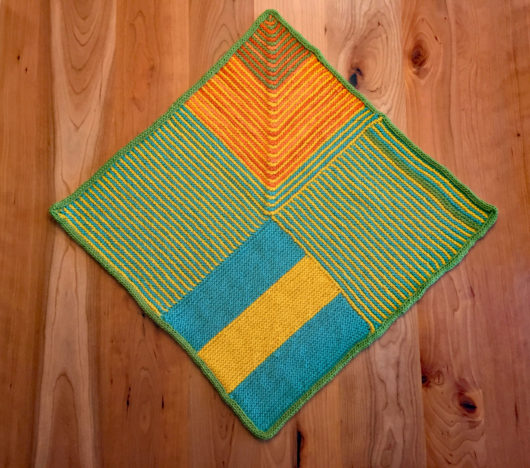
Here’s how I knitted Gargantuan. Square by square. I cast on 48 stitches and worked flat on US size 8 needles. 24″ circulars worked best for me. To adjust the size of what you end up with just change the number of stitches you cast on. As you look at the diamond shape, the first quarter is the right side of the diamond–the one with alternating garter stitch ridges. That’s 2 rows of one color followed by 2 of the other. Just carry the yarn you aren’t using up the side. I knit 48 garter ridges (96 rows) and that gave me pretty close to a perfect square shape.  I counted my cast-on as a half-ridge. Then I bound off.
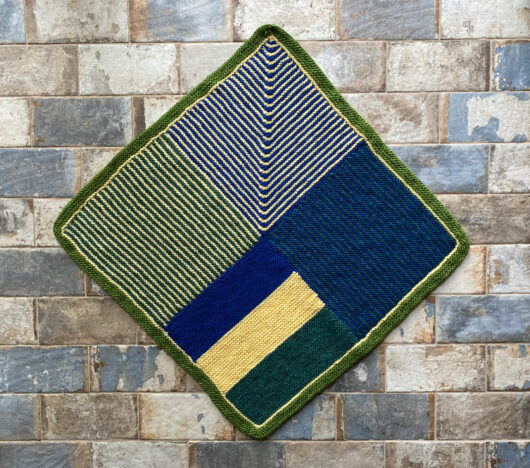

The next section is the wide stripes. This is where you add in a 3rd color. Pick up and knit 48 stitches on the left edge of the first square, looking at the square from the public side. Always pick up stitches looking at the public side. Knit 16 garter ridges (32 rows) of one color, followed by 16 garter ridges of another color, followed by 16 garter ridges of another color. Bind off.

The next section is the alternating stripes pattern again. Pick up 48 stitches on the left edge of the broader-striped section 2. Bind off.

In Druchunas’s shelter blanket, the final section is striped, but not mitered. So her patterning runs “straight” again. In my version, the last quarter of the alternating-colors square is mitered and the center decrease is raised. In the original, the final seam in the square needs to be sewn together. In my version there’s no sewing.

For this last quarter of the square, pick up (and knit) 48 stitches on the two remaining edges of the already-knit sections, plus one extra stitch in the center where the two sections meet. Set that center stitch off by putting a stitch marker on each side of it. Count the pick-up row as Row 1. Row 2, knit. Then every right-side row: knit to within 2 stitches of the center marker, knit 2 together, slip the marker, then knit the next 2 together using this technique: reverse the stitch after the marker and then knit 2 together through the back loops (including the flipped stitch and the next one). Knit the remainder of the row. Decrease this way either side of the marker on every right side row. Knit every wrong side row. When you have only 2 stitches remaining, knit them together.

Here’s how I worked the border on each of the individual squares. Sometimes I used one color. Other times I worked some stripes. Just change colors, if you’re going to, at the round change. You will now be working in the round, not flat.

Pick up and knit 96 stitches on each side, plus 1 stitch at each corner. Mark the corner stitch with a marker on each side. Put a visual cue, such as a different color stitch marker, to signal the round change. Purl the next round. On each right side round until you decide your border is wide enough, knit in the front and the back of each stitch on either side of the marked corner stitch. Alternate between the purl round and the increase-at-the-corner round to create mitered corners. Bind off when you’re satisfied with the width of the border. I worked 4 garter ridges and then bound off in knit on the right side.

In a few squares I ran out of yarn before I finished a section. Sometimes I just changed the colors on purpose. The squares look really nice even without rigidly adhering to a strict color plan.

I knit 16 squares. I could have decided on a different number. At some point there comes a time to stop and attach the squares to create a blanket. I could have “simply” slip-stitched the squares together. But for me slip-stitching is never “simply.” Mine tend to turn out messy. There’s also always the question of what yarn to stitch with. Definitely not Lamb’s Pride because a few swipes through the blanket and the yarn will snap.  Maybe you’ll decide to “just” use mattress stitch. But for me, it’s never “just.” Not on blanket squares anyway. Maybe I don’t mattress close enough to the edge of the knitting because I always get a major strip of over-firm lines in the blanket seams. They don’t feel very nice against skin. And they fall much more definitely than what I want for a blanket.

So I used a 3-needle bind-off technique to first attach 4 squares into a 4-square strip. And then to attach each of the 4 strips to one another. During this phase of the knit, it was back to knitting flat.

Before starting in on joining, I needed to decide what square would go where. I didn’t want 2 squares of similar colors next to one another. I wanted bright and dark squares arranged pleasingly. I cleared a space on the great room floor and laid out the squares in a bunch of ways. When I had what looked pretty good to my eye, I photographed the squares to see if the camera disagreed. This is pretty close to the final arrangement. (I later made a few changes on the fly.)

I chose a color of Lamb’s Pride for the garter stitch joins that hadn’t yet appeared in my blanket: gray. I picked up 105 stitches on the bottom edge of a square. I came up with that number because I had 96 stitches in an edge plus the number of stitches in my garter border. I knit 4 garter ridges, ending after a right side row. I left the stitches “live” on my needle. With another needle, I did the same on the top of the square to be joined. I was careful to align the squares so that the mitered section appeared in the same position throughout. With the right sides of each square facing each other, I worked a 3-needle bind-off. With a 3rd needle, knit through the first stitch on the front needle and the first stitch on the back needle. Knit through the next stitch on both needles. Then pass the first stitch over the just-knit stitch. Do this until all the stitches are bound off.

To attach one strip to the next I picked up 103 stitches along the edge of each square and 8 stitches in each gray (joining) section across the length of each of the 4 joined-together squares in the strip. Then I knit 4 garter ridges (7 rows). I did the same on the strip I wanted the 1st strip to be adjacent to. Then, with wrong sides facing in, I worked a 3-needle bind-off.

After all the strips were joined this way, it was time for a blanket border. I picked up stitches along one edge, knit 3 garter ridges and bound off looking at the right side. Next, I picked up stitches along the opposite edge and worked the same border. On the 3rd side, I picked up stitches along the entire edge, including picking up stitches along the edge of the already-knit borders. Same for the final edge as for the 3rd one.

It was pretty unwieldy at the end. Not only because of the length of the rows, but because of the weight of the blanket. I worked resting my knitting on the dining room table. This amount of Lamb’s Prides weighs nearly…nearly…16 pounds! Oh lordy, I’ve knit myself one of those very trendy weighted blankets.

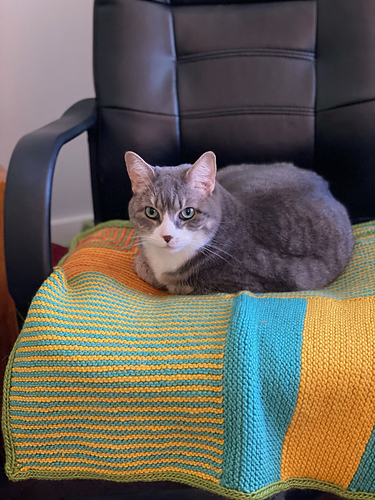
I’m sleeping under Gargantuan these days now that the weather’s cooled here. It’s a really good thing. Maybe when I have to wash it I’ll decide to unravel it back to its cat blanket origins. By then, friends and family will be needing replacements for their old ones. It will come full circle back to the cats.

Color exercises a/k/a cat blankies

I’ve a number of posts already on my exercises in color combinations that do double duty as cat-bed blankets. Instead of linking to the old posts, I’ve decided to include photos of the older ones after I show off my three new ones. And at the end I’ll tell you how I knit them.

First off, they work out great in the colorful line of Lamb’s Pride worsted, by Brown Sheep. What at first looked to me to be some very unlikely color combos turned out looking cool. And also cozy. Cozy enough that I’m beginning to think I might start saving the pieces up to someday piece together these squares to create a very colorful throw. That’s partly because all the cats I know already have one of these. When I knit with Lamb’s Pride worsted, on US size 8 needles, the piece takes about 3.5 skeins. And the result turns out to be a 24 inch square. During an especially mellow knit, the square approaches 25 inches.

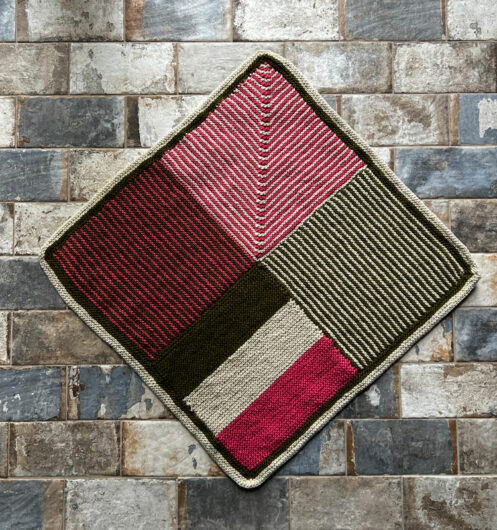
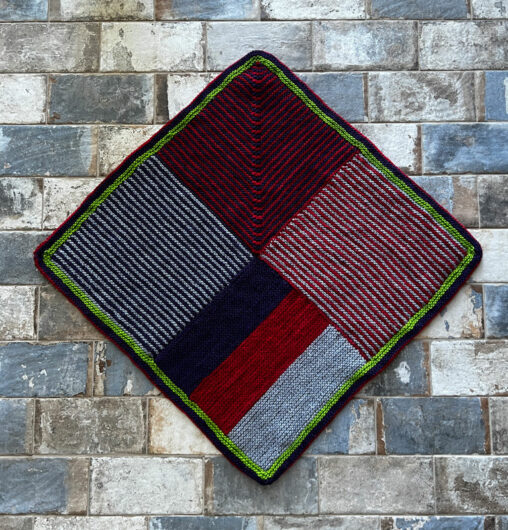
The main three colors in this one are: M187-Turquoise Depths, M80-Blue Blood Red, and M02-Brown Heather. There’s also some M-10 Cream making an appearance.

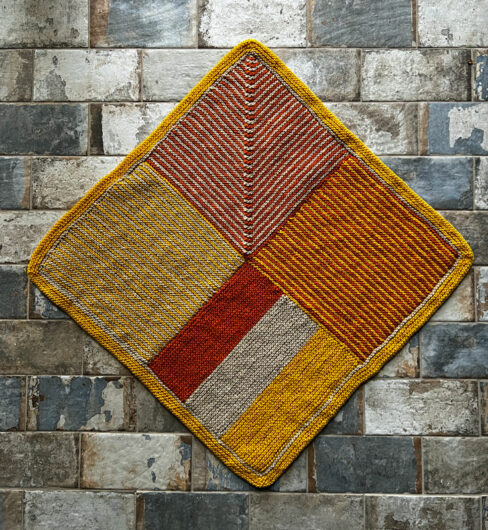
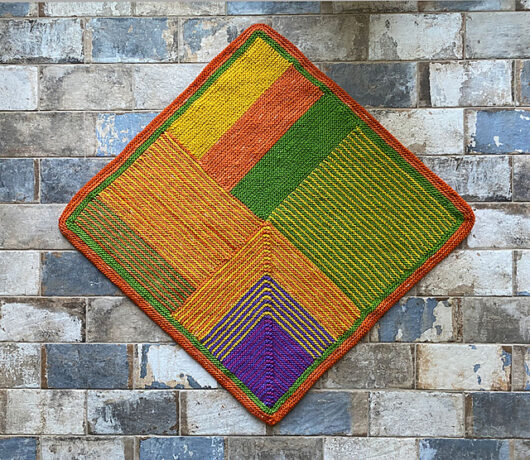
Next up is another new one in M-120 Limeaid, Orange Creamsicle, and M-155 Lemon Drop. I have no notes on a color number for Orange Creamsicle. It was basically a quite-bright orange with some cream streaking. A check on the Brown Sheep website doesn’t list it as a current color. And that purple splotch in the corner of the mitered square is M-59 Periwinkle alternating with French Lilac.

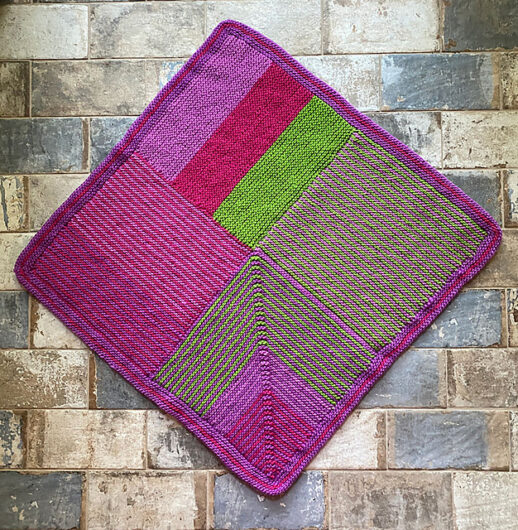
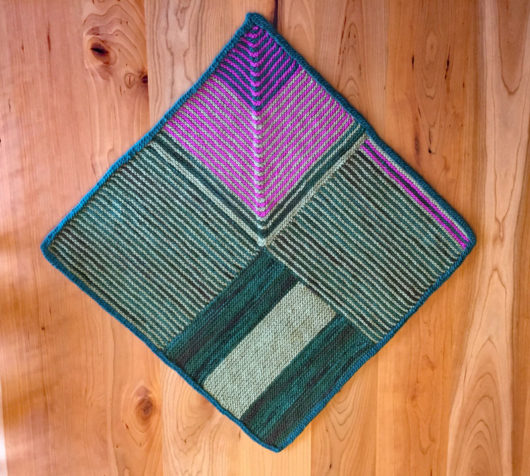
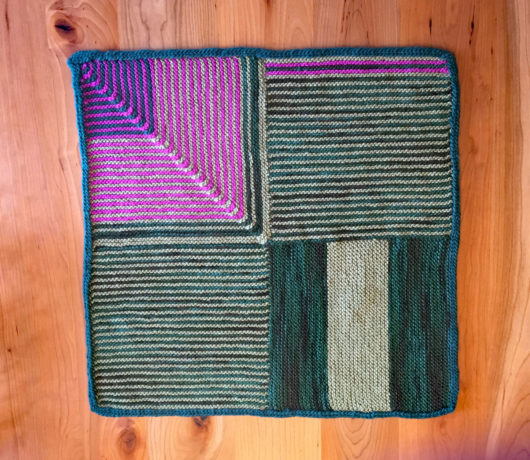
For this next new one I used  M-105 RPM Pink, M-38 Lotus Pink, M-120 Limeade, and  French Lilac. French Lilac may have been some special run, or possibly even a “seconds” because my notes say the ball band had no color number designation. It’s the very vibrant purple-pink in this next square.

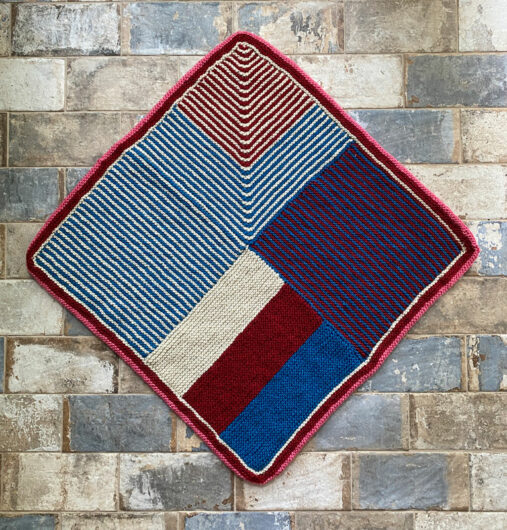
Now for a retrospective on squares I’ve blogged about before this.  Here’s one in M-68 Pine Tree, “VM”-Eucalpytus, M-184 Pistachio, Orchid Blush, and (I think) a touch of M-59 Periwinkle at the end of the mitered square.

Next is M-113 Oregano, M-159 Deep Coral, Orchid Blush, and a smidge of M-59 Periwinkle again. Orchid Blush is still available on Brown Sheep’s website, but its color number doesn’t show up there.

Here’s M-155 Lemon Drop, Orange Creamsicle, M-187 Turquoise Depth, and Lemony Lime. Some of these color numbers are lost to the antiquities (apparently).

This next one is M-59 Periwinkle, M-105 RPM PInk, Lemony-Lime, with some Orange Creamsicle tossed in.

Here’s Ink Blue, Rosey Velvet, Pine Shadows, and Orange Creamsicle again.

Next up is an experiment, two colors. I don’t like it as well. Maybe that’s why I didn’t record the identifying numbers on the colors.

Based on the amount of each two colors used, review of my used stash photos suggests that the colors are M-22 Autumn Harvest and M-59 Blue Boy.

This next one is M159 Deep Coral, M-78 Aztec Turquoise, M169 Woodland Green, along with a touch of one of the purples.

Finally, before we get to the “how to,” this next one is another experiment. I’d purchased a major amount of Lana Grossa Fusione at a deep discount and thought I’d try a square. Fusione is a bulky weight, so I used a US size 9 needle (rather than an 8). It’s a typically pricey yarn spun in 30% cotton, 26% alpaca, 25% wool, 19% nylon. This one is headed out soon to my granddaughter. One of her baby dolls could use a new blanket.

It’s pretty. And very soft. I’m fairly confident that baby doll will love it.

So, here’s how I make these. I give credit to Donna Druchunas for the inspiration. Her pattern for a bulky-weight shelter-cat blanket, with half or 75% fewer stitches than my version, minus the final mitered square and minus the border I use can be found on her blog and is also accessible via Ravelry.

Here’s how I make mine:

I use a US size 8 needle and end up at a gauge of about 18 stitches and 34 rows per 4 inches, in garter stitch. If you prefer a different gauge you’ll need more (or less) than 3.5 skeins of Lamb’s Pride Worsted per square. For Square 1, cast on 48 stitches and work for 48 garter ridges (96 rows). Change colors every other row. There’s no need to cut the yarn. It’s best to be consistent about whether you choose to bring the new color over (or under) the working yarn. Keep a consistent tension as you change colors.

Square 2 is the wide stripe. Pick up and knit 48 stitches on the right side of Square 1. Work all pick-up of stitches looking at the right side (the public side) of the square. Work 16 ridges (32 rows) of Color 1, 16 ridges of Color 2, 16 ridges of Color 3. You will have to cut the yarn at the end of each 16-ridge section. Join the new color looking at the right side of the work.

For Square 3, pick up and knit 48 stitches along the left side of Square 2. Work Square 3 the same way you worked Square 1.

Square 4 is the mitered square. It’s my major modification of Duchunas’s version. With the right-side facing, pick up (and knit) 48 stitches on the left side of Square 3 and 48 stitches on the top of Square 1. Place a stitch marker to mark the middle (after you pick up the first set of 48 stitches). Count that picked-up row as Row 1. Knit across all 96 stitches for Row 2, a wrong-side row. Continue to alternate colors, starting with the next row, a right-side row. On each right-side row: knit to within 2 stitches of the center marker and knit two together. Slip the marker. Reverse the next stitch on the needle and then knit 2 together through the back loops (including the flipped stitch and the next one). Knit the remainder of the row. Continue to decrease this way at the center of every right-side row, eliminating 2 stitches each right-side row and knitting every wrong-side row. When you have 2 stitches left, knit them together.

Next, knit the border. Working in the round works well. Looking at the right side, pick up and knit 48 stitches on each side of each square, plus 1 stitch at each corner. Mark the corner stitch with a marker on each side of it. I use a 60 inch circular needle but a somewhat shorter needle will be OK. Continue working garter stitch in the round. That means you need to follow a knit round with a purl round. So, after the pick-up round, purl the next round. To keep the corners from curling, work mitered corners by knitting in the front and the back of each stitch on either side of the marked corner stitch on each right-side (knit) round. Bind off when you’re satisfied with the width of the border. Five or six garter ridges (10 or 12 rounds) works well.  Knitter’s choice on whether to alternate colors or add a one-ridge stripe or just use one color. Also knitter’s choice on whether to bind off on a right-side or a wrong-side row. I prefer a knit bind-off on a right-side row.

Druchanas’s pattern called for an applied I-cord border. That’s an interesting look. And if you want the garter-stitch look without using mitered corners or circular needles, you can pick up stitches along each side, adding extra stitches to lengthen the border. Then you can sew the corners together.

Yipes. After all these words, maybe your eyeballs need a rest. Here’s some photo inspiration.

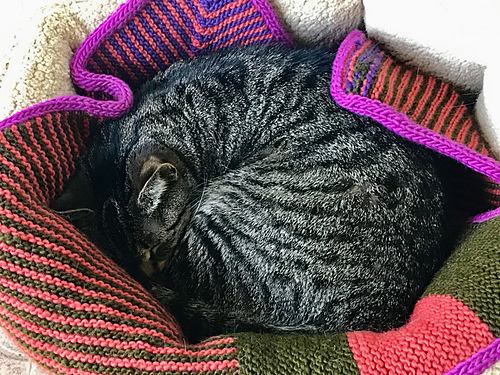
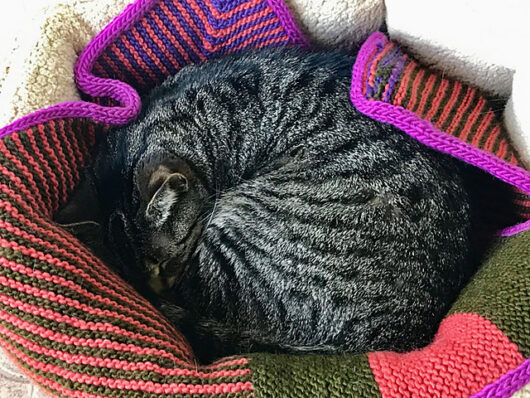
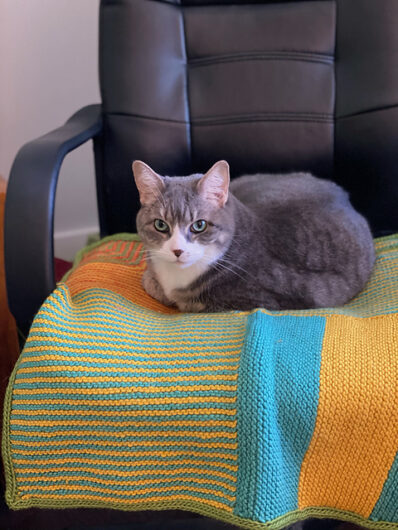
Cats really do like these. My theory is that it’s something about the 85% wool, 15% mohair mix. Or maybe cats just know warm wherever it’s to be found.

Cat stuff

This fingering weight stuffie is Sara Elizabeth Kellner’s freebie, Tiny Window Cat.  What a cutie! Many yarnie types will know how tall the Clover “catcha-catcha” counter is. Two and 3/4 inches. 7 centimeters. Tiny cat ends up about half an inch taller.

I felt like my cat was looking as if she needed her own cozy cat basket.

To knit the sides of Tiny’s basket, I cast on 32 stitches, in the round. I knit 9 rounds, purled 1 round, knit 9 rounds, and bound off. Then I folded the basket on the purl round and sewed the cast on and bound off edges together, wrong sides facing each other. Echoing the construction of the bottom of the cat, I picked up 32 stitches along the bottom edge. I worked rounds 1 through 5 of Kellner’s pattern for the bottom of the cat, except on rows 1, 3 and 5, I worked the decreases 8 times around to form the bottom of the basket.

Tiny cat ended up in my granddaughter’s knitted “lovies” stash. Even her older brother thinks this guy is cute.

Keeping to today’s cat theme, I have two new cat basket blankets to show off. You’ve seen me working these before, here. I always knit them in Brown Sheep’s Lamb’s Pride Worsted.

I have a theory that that dab of mohair in the yarn turns out to be a real cat whisperer.

These two are my newest.

They’ve already been gifted to two good cats, in one good home, who needed a few more cozy landing spots.

This is an adaptation of a freebie pattern from Donna Druchunas. Hers is designed for super bulky yarn. My version uses worsted weight. Mine increases the stitches in each section, adds that mitered square with decreases on the diagonal that avoids any sewing after the last square is finished, and includes a knitted-on edge. You will find the details on how I knit these cat blankets here.

Cat bed cozies

You saw two of these five cat (or dog) bed blankets a few months back. I think they make an interesting color statement as a set, so I’m including my first two attempts along with the three newer ones. My bed blankets are inspired by Donna Druchunas’s Garter Stitch Cat Shelter Blanket pattern.

I’ve knit mine in 100% wool–totally impractical for shelters. And maybe some will decide that they’re also impractical for households. From what I hear, cats don’t agree. Now that I think more about it, cats probably just don’t care about practical. If it feels cozy and a bit scratchy, they want it. As for practicality, I recommend the cats’ humans just wash the blankets and put them in the dryer when they need to be cleaned. I knit them somewhat oversized. The blankets will felt and the cats will still like them.

I’ve knit mine in Brown Sheep Lamb’s Pride Worsted.

More on my modifications of the pattern in a quick bit. These color studies turned out to be great fun to knit.

Here this pair is awaiting their test run.

Halo approves.

Feisty does too.


Lucy votes “yes.”

In fact, she even managed to co-op her housemate Jasmine’s blanket for awhile.

Here are my modifications to the Druchunas pattern.

  • Instead of working the blanket at a superbulky weight of 2 stitches to the inch, I used a worsted weight at 4 stitches (and 8 rows) to the inch.
  • For Squares 1-3, I cast on (or picked up) 48 stitches and worked for 48 ridges (96 rows).
  • I worked a few random rows of color, not so much because I planned it as that I thought I would run out of yarn otherwise.
  • For the final square, I worked a miter. I picked up (and knit) 48 stitches on the left side of Square 3 and 48 on the top of Square 1 and marked the middle stitch. Stitches are always picked up looking at the right (the public) side. Work on circular needles on this square. Count the pick-up row as Row 1. Row 2, knit. Then on every right-side row: knit to within 2 stitches of the center marker, K2 together. Slip the marker. Reverse the next stitch on the needle and then K2 together through the back loops (including the flipped stitch and the next one). Knit the remainder of the row. Decrease this way at the center of every right-side row. Knit every wrong-side row without any decreases. When 2 stitches remain, knit them together. You end up with a square the same size as the other squares.
  • I worked an “applied I-cord” border.  Cast on 4 stitches on double points. Start working the I-cord at a corner. Slide the stitches and knit 3 stitches, slip the next stitch (purlwise), yarn over, pick up and knit 1 stitch from the edge. Pass the yarn-over over the picked-up stitch. Then pass the slipped stitch over the picked-up stitch. Repeat the bolded directions until you’ve knit the entire border. The yarn-over trick covers the color blip that would otherwise appear. I picked up one stitch for every garter ridge, picking up the strand between the garter bumps. It will probably look best if you work the I-cord looking at the wrong (nonpublic) side. I worked an extra pickup or two at each corner. Graft/sew the beginning of the I-cord to the end of it.

Garter Stitch Squared

Since past is often prologue, you’re probably thinking that I’m up to my old tricks and have knit more dishcloths. Actually, I have been knitting dishcloths. But these are not dishcloths. And they aren’t potholders either. These are sized at 22 inches by 22 inches. Here’s a very big hint:

Yep, cat bed blankets!

Feisty is one of my brother Tom’s cats. This is day one with the new blankie and Feisty’s enjoying it already! Quite unexpected because, well, because cats don’t just do what you want them to. Pretty much only they know their own mind.

Here’s Halo, also enjoying the new nest.


I have a theory about what it is about these blankets that make them cat magnets. (And the theory has nothing to do with catnip.)

But first, I need to give credit where it’s due. With some modifications–more on that in a minute–this is Donna Druchunas’s Garter Stitch Cat Shelter Blanket, a freebie available through Ravelry. I knit mine in Brown Sheep’s Lamb’s Pride Worsted. That would not be a choice for a shelter, where acrylic is king. But for pampered kitties whose owners don’t mind dealing with wool, it’s a good choice. When it’s time to wash the blankets, my brother will put them inside a pillow case (pinned closed) and will wash them as roughly as possible. They will look different after washing, but they’ll still be attractive and adequately sized. After the first wash, they won’t need any special treatment. Methinks the cats will still recognize and enjoy them after they’ve felted, even though they’ll be pads more than blankets.

Here’s my modifications on the pattern.

  • Instead of working the blanket at a superbulky weight of 2 stitches to the inch, I used a worsted weight at 4 stitches (and 8 rows) to the inch.
  • For Square 1-3, I cast on (or picked up) 48 stitches and worked for 48 garter ridges (96 rows).
  • I worked a few random rows of color, not so much because I planned it as that I thought I would run out of yarn.
  • For the final square, I picked up (and knit) 48 stitches on the left side of Square 3 and 48 on the top of Square 1 and marked the middle stitch. Pick up the stitches looking at the right (the public) side. Work on circular needles on this square. Count that pick-up row as Row 1. Row 2, knit. Then every right-side row: knit to within 2 stitches of the center marker, K2 together. Slip the marker. Reverse the next stitch on the needle and then K2 together through the back loops (including the flipped stitch and the next one). Knit the remainder of the row. Decrease this way at the center of every right-side row. Knit every wrong-side row. When 2 stitches remain, knit them together. You end up with a square the same size as the other squares.
  • I worked an “applied I-cord” border.  Cast on 4 stitches on double points. Start working the I-cord at a corner. Slide the stitches and knit 3 stitches, slip the next stitch (purlwise), yarn over, pick up and knit 1 stitch from the edge. Pass the yarn-over over the picked-up stitch. Then pass the slipped stitch over the picked-up stitch. Repeat the bolded directions until you’ve knit the entire border. The yarn over covers any color blip that would otherwise appear. I picked up one stitch for every garter ridge, picking up the strand between the garter bumps. It will probably look best if you work it looking at the wrong (nonpublic) side. For the pink blanket I worked looking at the wrong side. For the green one, I worked looking at the right side. At the corners, I worked an extra pickup or two. Graft/sew the beginning of the I-cord to the end of it.

Oh. You might still be wondering about that theory of mine for why these turn out to be cat magnets. I think the cats like the yarn. Lamb’s Pride is seriously nice and scratchy. It’s 85% wool and 15% mohair. Maybe it’s the mohair that does it. My two cats, J. Eddie and Hoover, used to love their Lamb’s Pride blankets! I didn’t have the Druchunas pattern to work from then. I just knit them plain garter stitch pads. The cats snuggled on them contentedly.